We've always been pretty good at filing our taxes before April...although, I will admit that the process is always a terrifying one. We've had years when we've owed the state, years when we've owed the feds, years when we've owed both, and years of refunds.
This year...REFUND! Whoot, whoot.
Now this is where we usually run into problems.
In years past we usually decide to put the majority of our refund towards a bill. However, we've forever fallen into the "why-don't-we-just-take-a-couple-hundred-dollars-for-ourselves" pit. We've always justified it by convincing ourselves that we work hard and "deserve" a little fun.
This year though, I think we've finally become sick and tired enough to just throw the whole lot into the debt snowball.
So, all $2877 went toward paying off our car. Truth be told, we added our own $23 to that total to make the payment an even $2900.
Now we owe just a little under $1900 on our little car. If we make only the minimum payments we'll have it out of the way in just 6 months. But we're going to try to do it in just 3! I can't wait until I can say that I own that little fella and all the stickers that are stuck to the kids' windows!
From there on out, things should really start moving! (At least, we hope so.)
Sunday, February 26, 2012

Wednesday, February 1, 2012
February Goals
January Goal Results:
February Goals:
And coming up this weekend...freezer meals!
- Spend no more than $40/week on groceries.
FAIL. I cannot lie. It was the Valentine's Day candy that got us here.
- Double the car payment.
SUCCESS. And it felt so good!
February Goals:
- Take a list to the grocery store each and every time we go
- Double the car payment
And coming up this weekend...freezer meals!
Saturday, January 21, 2012
Homemade Laundry Detergent and Dryer Sheets
I have heard about homemade laundry detergent for the last year, but all I could think was, "Homemade laundry detergent? Isn't that going too far with this whole money-saving-thing?" as well as, "There are just some things that I will not be a tight wad about...like laundry detergent."
But I decided to give it a shot on this boring, rainy Saturday.
I used this recipe that I found at Why Not Sew? This is an outstanding tutorial with lots of great pictures. I didn't take any pictures because I was SO skeptical that I didn't want to end up wasting time getting cute pictures of something that might end up in the garbage. But I digress.
Homemade Laundry Soap
1. Grate entire bar of soap into a large pan; add one gallon water and heat until soap is dissolved...Stir, stir, stir (and DO NOT walk away. This stuff can bubble right up and over in an instance).
2. Add the Borax and washing soda (which is NOT the same this as baking soda) and stir again. This is the step where you will go from a liquid soap mixture to a gel soap mixture.
3. Pour in one gallon COLD water. Stir, stir, stir.
4. Use a funnel to fill gallon sized containers. (I used drink containers that I found at the store).
If you use just 1/2 cup detergent for each load of laundry, your 2 gallon containers will clean 64 loads of laundry. My bar of Ivory soap was $0.64, using some simple math (product cost divided by total cups of product) I estimate that one cup of washing soda is about $0.52, and one cup of Borax is roughly $0.55.
That means that I made two gallons of laundry detergent for $1.71. At the store a few weeks ago I bought two gallons of Tide for $10--and that was on sale, WITH a coupon. It's usually closer to $15.
I immediately washed a couple loads of laundry after making my batch. Bingo. Totally clean! I NEVER would have believed it if I didn't try it myself.
Homemade Dryer Sheets
This one was a REALLY hard sell for me. It seemed absolutely RIDICULOUS to think that rags soaked in fabric softener could take the place of Bounce dryer sheets. But low, and behold, it works! I followed this tutorial to make my sheets.
2. Place in plastic container
3. Pour fabric softener over the rags
When it's time to throw the laundry in the dryer just open the container, ring out a homemade sheet (dripping the excess softener in the container), and throw it into the dryer with the wet clothes.
This is absolutely remarkable. It leaves the clothing just a soft, smells just as good, and removes the static from the clothes just as well as name brand sheets. When the clothes come out the rag will be soft and dry and can be thrown back into the container to be used again.
I poured just one cup of fabric softener into the container. That one cup of Downy cost about $0.70. The same cup will treat about 100 loads (really, ONE HUNDRED loads). So, $0.007 per load. Bounce dryer sheets end up being about $0.05 per load.
But I decided to give it a shot on this boring, rainy Saturday.
I used this recipe that I found at Why Not Sew? This is an outstanding tutorial with lots of great pictures. I didn't take any pictures because I was SO skeptical that I didn't want to end up wasting time getting cute pictures of something that might end up in the garbage. But I digress.
Homemade Laundry Soap
- 1 bar soap (I used IVORY)
- 1 cup Borax
- 1 cup Washing soda
- 2 gallons water
1. Grate entire bar of soap into a large pan; add one gallon water and heat until soap is dissolved...Stir, stir, stir (and DO NOT walk away. This stuff can bubble right up and over in an instance).
2. Add the Borax and washing soda (which is NOT the same this as baking soda) and stir again. This is the step where you will go from a liquid soap mixture to a gel soap mixture.
3. Pour in one gallon COLD water. Stir, stir, stir.
4. Use a funnel to fill gallon sized containers. (I used drink containers that I found at the store).
If you use just 1/2 cup detergent for each load of laundry, your 2 gallon containers will clean 64 loads of laundry. My bar of Ivory soap was $0.64, using some simple math (product cost divided by total cups of product) I estimate that one cup of washing soda is about $0.52, and one cup of Borax is roughly $0.55.
That means that I made two gallons of laundry detergent for $1.71. At the store a few weeks ago I bought two gallons of Tide for $10--and that was on sale, WITH a coupon. It's usually closer to $15.
That means that making your own laundry detergent is an 89% savings.
I immediately washed a couple loads of laundry after making my batch. Bingo. Totally clean! I NEVER would have believed it if I didn't try it myself.
Homemade Dryer Sheets
This one was a REALLY hard sell for me. It seemed absolutely RIDICULOUS to think that rags soaked in fabric softener could take the place of Bounce dryer sheets. But low, and behold, it works! I followed this tutorial to make my sheets.
- Old rags or towels (I cut up 2 old baby burp clothes)
- 1 cup Fabric softener
- Plastic container to hold sheets (I used a small pencil box)
2. Place in plastic container
3. Pour fabric softener over the rags
When it's time to throw the laundry in the dryer just open the container, ring out a homemade sheet (dripping the excess softener in the container), and throw it into the dryer with the wet clothes.
This is absolutely remarkable. It leaves the clothing just a soft, smells just as good, and removes the static from the clothes just as well as name brand sheets. When the clothes come out the rag will be soft and dry and can be thrown back into the container to be used again.
I poured just one cup of fabric softener into the container. That one cup of Downy cost about $0.70. The same cup will treat about 100 loads (really, ONE HUNDRED loads). So, $0.007 per load. Bounce dryer sheets end up being about $0.05 per load.
This means homemade dryer sheets are an 86% savings.
Tuesday, January 3, 2012
January Goals
This year we are going to set just two or three goals. Hopefully this will help us break this whole Money Makeover into bite-sized pieces.
January Goals
January Goals
- Spend no more than $40/week on groceries (so no more than $150 this month, since there are nearly 5 full weeks in January this year)
- Double the car payment
Thursday, December 29, 2011
Carpet Stain Remover
Oh, carpet stains. They are so much like laundry...you are never really finished with either. So when I happened to come across this article I was intrigued. Could removing carpet stains really be so simple and so cheap? Just one part ammonia, one part water, and steam the stain out?
That's a 94% savings folks. But does it work? Well, let me show you how it worked for us. In the spring someone walked right into the house with muddy feet and left a few lovely dirt stains.
 Jillee really did a great job explaining this process, so it was simple to follow.


In the past I've been a sucker for carpet sprays. Like RESOLVE for example. A 22 oz. bottle of RESOLVE costs about $4.23. Now put this into perspective. One gallon = 128 oz.
That means that one gallon of RESOLVE would cost $24.61!
Amazing.
In contrast one gallon of this homemade stain remover costs about $1.50 to make.
That's a 94% savings folks. But does it work? Well, let me show you how it worked for us. In the spring someone walked right into the house with muddy feet and left a few lovely dirt stains.

- Mix one part ammonia with one part hot water. I mixed one cup of each when I tried this.
- Apply mixture to the stain. You DO want to give the stain a pretty good soak, so don't be too shy about wetting the stain.
- Place a clean white towel (I used old baby burp cloths) over top the wetted stain.
- Iron over the towel on the STEAM setting. This is what I saw after just ONE time ironing over the stain.

- Repeat the process as desired.

- Your house will smell like ammonia for a few hours, there's no getting around it.
- If you have shag carpet iron in BOTH directions, otherwise you will only clean one side of the carpet fibers.
- This same process also lifted a red piece of salt water taffy that had been ground into my carpet!
- This creates ammonia gas (because you are evaporating the liquid ammonia), so keep the windows open and be careful about how much ammonia you are ironing up at a time.


Now, let's be honest. You can still see some of the stain in the AFTER picture, right? That's because the whole carpet really does need a professional cleaning. In fact, after I finished just this spot it was obvious how dirty my carpet really is. I mean look how CLEAN the carpet is right there in the middle of the old stain!
To sum things up, this process is amazing! It will certainly come in handy for spilled drinks, potty-training accidents, muddy footprints, and sticky food that gets caught in the carpet. I'm so grateful I came across this cleaning recipe!
Tuesday, December 27, 2011
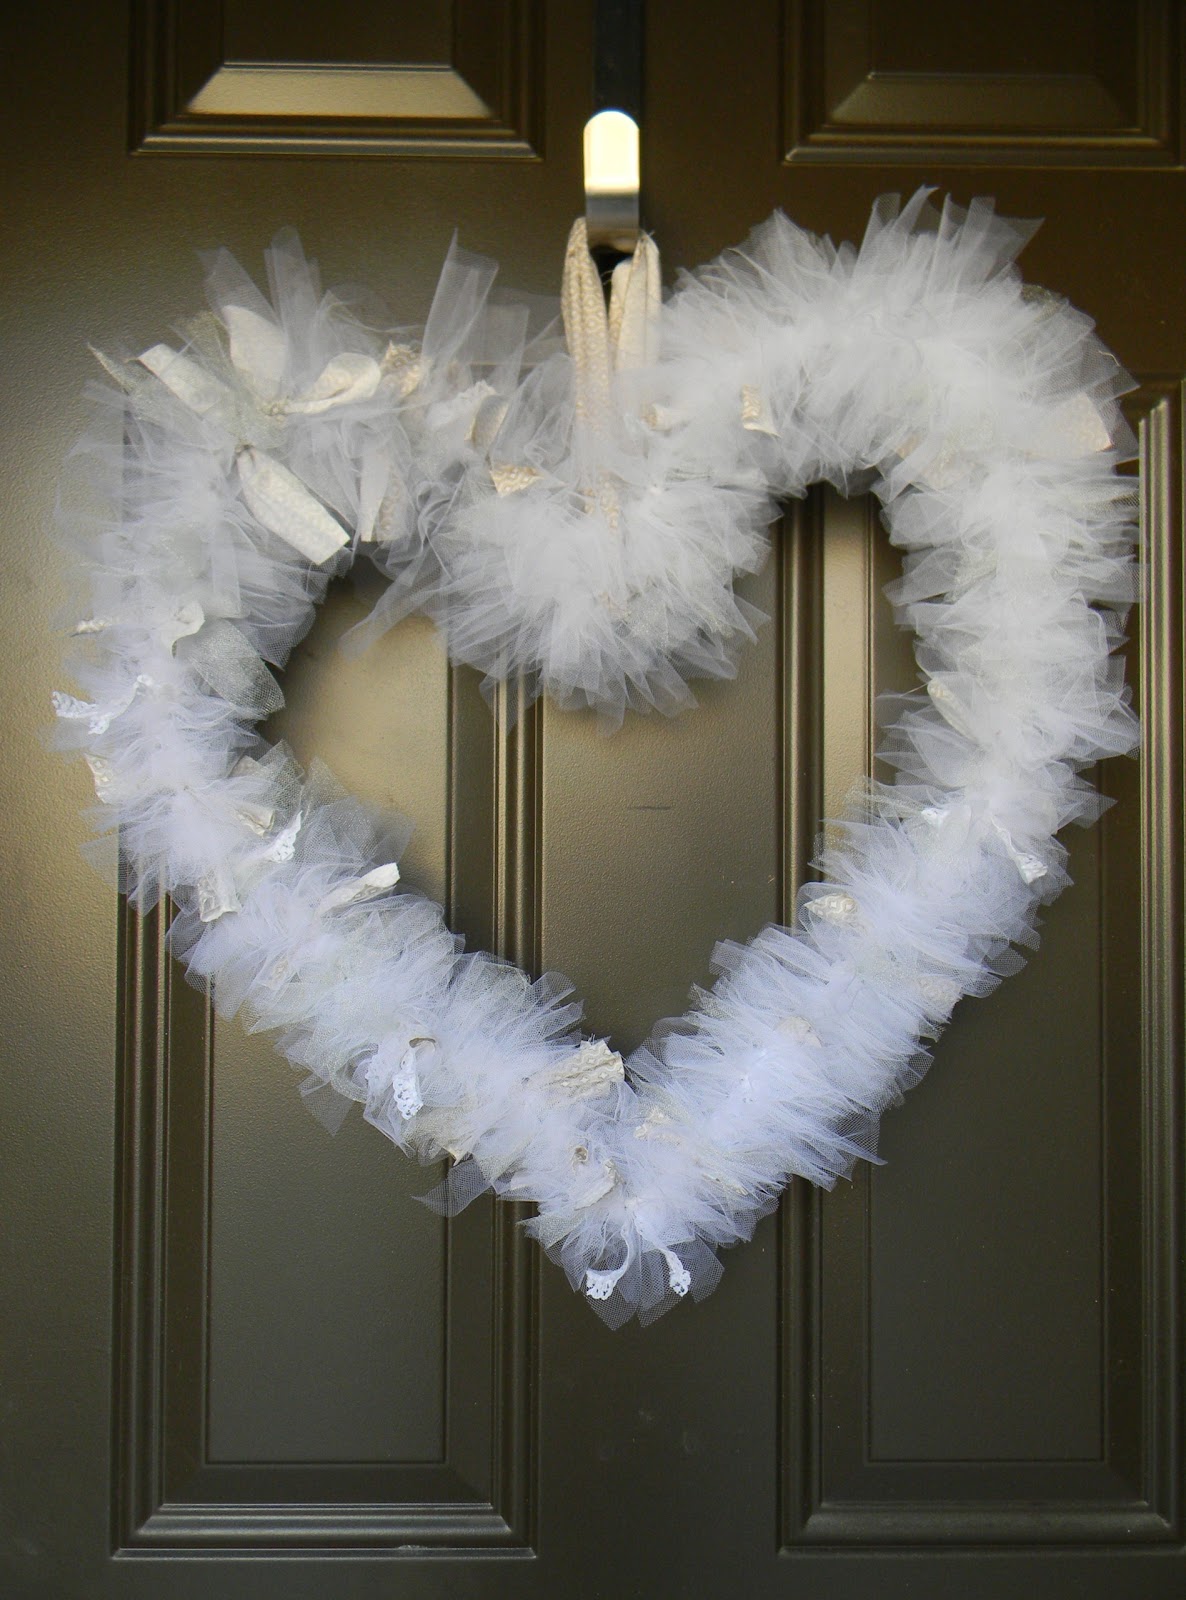
Valentine's Wreath
As far as crafting on a budget, this is one of my favorite projects completed.
How to:
1. Using wire hangers or heavy-duty wire from a hardware store, make the shape of a heart. I used 0.064" wire (14 ga.) and I doubled it to make the wreath more sturdy.
2. Using 5 yards of Tulle, cut strips that are about 2 inches by 4.5 inches.
3. Tie the strips of Tulle in knots around the entire wreath.
4. Add strips of lace, fabric, or other colors of tulle to give more dimension to the wreath.
6. Add a long strip of fabric to the wreath to use for hanging.
6. Add a long strip of fabric to the wreath to use for hanging.


Cost:
- 5 yards of Tulle: On sale at Hobby Lobby for $0.77/yard. I purchased 5 yards (total = $3.84) and used a 40% coupon making my total $2.30
- Wire: FREE! We had some left over wire from a fencing project 2 years ago, but we also had wire hangers in the closet that I could have used.
- Fabric Strips: FREE! I save a lot of my odds and ends when I sew, and I had just what I needed for this project.
Grand total: About $2.50 after taxes.
Wednesday, December 21, 2011
Little Girl's Felt Purse
The thing I miss most about our pre-money makeover life is all of the crafting I was able to do. There's nothing quite like brand new fabric. (Sigh). So I've been using what I already have when it's time to craft. And today I present to you the little girl's felt purse.

Here's what you need:

1. Choose the felt you want to use for the body of the purse. I chose a tan color. Fold the felt square until you reach the size you want the purse to be.

2. Trim the excess felt from the top, and trim the folded felt until you reach the width you would like your purse to be. I like using a folded piece of felt for the purse because in the end I only have to stitch two sides together rather than three.

3. Cut flower pieces from other colors of felt. I chose to make a modern, non-symmetrical flower. I cut one set of white petals larger than the other.

4. Position your flower on the front of your purse. Using a coordinating color of embroidery floss stitch all three flower pieces and the purse together.

When you finish you should have something like this.

5. Now you can embellish however you would like. I chose to use green embroidery floss and stitch a vine around the flower. You can free-hand it like I did, or you could use a water soluble marker and draw your design first.

6. I also added a couple of teal stars to my vine. Once you have finished the front of your purse cut two pieces of ribbon to serve as handles.

7. Turn the purse over so that the right side is facing down. Use a coordinating color embroidery floss to stitch the top 1/4 of the purse under.

8. While stitching the 1/4 inch down, add the ribbon pieces where you would like the handles to be.

When you finish the length of the top of the purse you should have something like this:

9. Fold the purse right-side-out so you can see the front of the purse. Repeat the last step with the back side of the purse as shown.

10. Fold the purse together again, right sides together, and stitch up the sides.
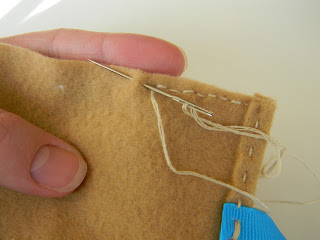
11. Repeat with the other side and flip right-side out. I know my little one loves this purse, and I hope someone else out there will too.


Here's what you need:
- Felt Squares
- Embroidery Floss
- Ribbon
- Needle
- Scissors

1. Choose the felt you want to use for the body of the purse. I chose a tan color. Fold the felt square until you reach the size you want the purse to be.

2. Trim the excess felt from the top, and trim the folded felt until you reach the width you would like your purse to be. I like using a folded piece of felt for the purse because in the end I only have to stitch two sides together rather than three.

3. Cut flower pieces from other colors of felt. I chose to make a modern, non-symmetrical flower. I cut one set of white petals larger than the other.

4. Position your flower on the front of your purse. Using a coordinating color of embroidery floss stitch all three flower pieces and the purse together.

When you finish you should have something like this.

5. Now you can embellish however you would like. I chose to use green embroidery floss and stitch a vine around the flower. You can free-hand it like I did, or you could use a water soluble marker and draw your design first.

6. I also added a couple of teal stars to my vine. Once you have finished the front of your purse cut two pieces of ribbon to serve as handles.

7. Turn the purse over so that the right side is facing down. Use a coordinating color embroidery floss to stitch the top 1/4 of the purse under.

8. While stitching the 1/4 inch down, add the ribbon pieces where you would like the handles to be.

When you finish the length of the top of the purse you should have something like this:

9. Fold the purse right-side-out so you can see the front of the purse. Repeat the last step with the back side of the purse as shown.

10. Fold the purse together again, right sides together, and stitch up the sides.

11. Repeat with the other side and flip right-side out. I know my little one loves this purse, and I hope someone else out there will too.

Subscribe to:
Posts (Atom)